Help Center
Frequently Asked Questions
Customer Service
You can contact our customer service if you have some questions on your orders.
Here is our customer service email: support.eu@camplux.com
Once your order ships out, you will receive an email with your tracking number(s). Please search the tracking provided on the corresponding shipping carrier website to view the estimated day of delivery.
Water Heater
A. Check if the polarity of the batteries are positioned correctly.
B. Check if the water inlet, water outlet and gas inlet are connected to the right pipes.
C. Heater wont ignite if the water pressure is too low, please make sure you have enough water flow.
D. Check the water inlet and filter to make sure there is no clog.
E. Disconnect the shower hose and shower head and let the water gush out from the heater (set gas knob to minimum and water knob to maximum), if it ignites that means there is a clog either in shower hose or shower head.
A. If it’s the first time you start the heater, to exhaust the extra air completely, please try start it couple of times.
B. Disconnect the gas hose from the gas inlet and check if the gas is flowing. If the regulator is defective the gas will not flow and the unit will not ignite.
C. Check if you have enough propane.
D. If you are using a new tank of gas, the solenoid valve may not work because the gas pressure is too high. Try to turn on the water faucet first, gas source valve later. And try to start the heater again.
E. Disconnect the shower hose and shower head and let the water gush out from the heater (set gas knob to minimum and water knob to maximum), if that fix the problem there is clog either in shower hose or shower head.
PRECAUTION:
F. Please make sure the water heater is connected to the correct type of gas line. If the unit is LP it should be connected to LP line or NG to NG line. It’s possible to cause an ignition failure or an explosion when connected to the wrong gas line. It’ll produce yellow flame or black smoke if connected to the wrong gas line.
A. Kindly restart the water heater few times to exhaust the extra air inside. If does not fix the problem try to replace the gas regulator using a standard grill regulator.
B. Check if the screws are properly secured if the water heater is mounted.
C. Check the battery if it’s still okay.
A. Check if you still have enough gas. Check your gas cylinder.
B. Check if the water pressure is too low to ignite the heater. If you are using well water it is best to use a water pump to increase the pressure.
C. Change the batteries.
D. Disconnect the shower hose and shower head and let the water gush out from the heater (set gas knob to minimum and water knob to maximum), if that fix the problem there is clog either in shower hose or shower head.
A. Turn up the gas knob and turn down the water knob.
B. Turn on the gas valve completely.
C. Shorten the gas pipe if it is longer than 5 meters.
D. Choose a suitable gas regulator for low pressure.
E. Avoid using gas in multiple appliances all at the same time.
A. Open the front panel of the water heater and air blow the heat exchanger with an air compressor to remove if there is any debris or clog inside. After, set the gas knob to minimum and water knob to maximum and start the water heater and check if the black smoke will be gone.
B. If the issue still persist unplug the gas line and stop using the water heater. Call for service.
A.check and reduce your heater’s temperature setting.
B.you must fully open the shut-off valve and ensure more water flow
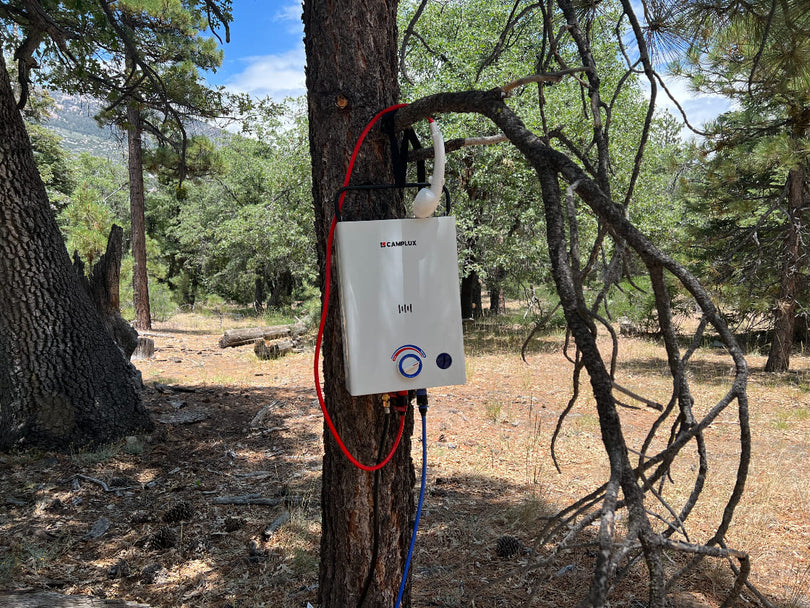
While your Camplux water heater is functioning normally, it will produce a deep blue flame. But when your heater produces a yellow flame, you can’t overlook it as it is another problem.
Yellow flame causes extreme smoking and dirt build-up in the flue tubes, combustion chamber, and gas burner.
A.On your Camplux water heater’s front cover, you will see the middle horizontal window or viewer panels. Look through the window to check whether your heater produces a blue or yellow flame,We strongly recommend you not to use your Camplux water heater when it produces a yellow flame.
B.Replace the cracked gas regulator.
C.From the gas burner’s top, remove the scale and adequately clean the burner and unclog the main burner.
D.Ensure sufficient air circulation and proper ventilation in your heater.
E.Clean the pipes properly and remove the vent or flue’s blockage.
A.Check the correct installation.
B.Check and tighten your water tank’s pipe connection.
C.Replace the cracked heater, malfunctioning T & P relief valve, loose or damaged gaskets, lousy drain valve, and the defective hot and cold water inlet and outlet.
E0:Hot water sensor not working.
Causes : Short circuit. Loose junction pat. A defective or broken sensor.
Solutions : Prevent your heater’s overheating to avoid short circuits. Tighten the junction pat. Replace the broken or faulty sensor.
E1:Failed ignition system.
Causes : Loose junction pat. Close or partially open gas valve. Close water shut-off valve.
Solutions : Tighten the junction pat. Check and open the gas and water shutoff valve fully.
E2:Flame Failure Protection.
Causes : The heater fails to detect the flame. The gas supply is off. Empty tank or low fuel supply. Damaged fuel sensor.
Solutions : Ensure your water heater is perfectly detecting the flame. Check and turn on the gas supply. Refill the fuel tank and ensure proper fuel supply. Replace the faulty fuel sensor.
E3:Overheating protection.
Causes : Overheating controller. Dry combustion.
Solutions : Ensure your heater controller is not overheating.
E5:Pressure switch failure.
Causes : Too low power supply voltage. Motor malfunction.
Solutions : Ensure high power supply voltage. Replace the bad motor.
E7:Solenoid Valve.
Causes : Valve’s open circuit. Valve’s short circuit. Faulty or disconnected valve.
Solutions : Prevent the valve’s opening and short circuit. Replace the lousy valve. Make sure the valve is properly connected.
Eb:Residual Fire Failure.
Causes : Solenoid issue. Malfunctioning PCB controller.
Solutions : Replace the faulty PCB controller. And fix the solenoid issues.
A.Close your heater’s hot water faucet and turn off the remote control’s switch
B.Wait 5 minutes and then turn on the switch again.
C.Now open your heater’s hot water faucet
After following these steps, if the error code still appears on your heater, you should repeat these phases B-C times.
You may smell like something burning in your heater when the accumulated dirt, dust, or debris build-up comes in contact with your heater’s warm part.
The heater gets too hot, rust in the water, the water heater leaks from the bottom, and the heater making odd noises are signs that your hot water heater is going out.
Against scalding, your Tankless water heater’s recommended normal temperature is 120 degrees Fahrenheit. But the heater’s common default setting is 140 degrees.
STOVE
Burner
First, pull out the wires of ignition needle and sensor needle. Second, unscrew and take off the flame shield. Third, unscrew the part connecting the burner and gas water valve, burner and inner shell and clean out the dust. Before putting back the panel, ensure that all parts are connected, especially the O-ring seal. For your safety, please use soapy water test on connection between burner and gas water valve, then operate the machine on lowest flame and highest flame. This will help you check for gas leak.
Thermostat
Pull out the wires on the thermostat, and unscrew the thermostat. The new thermostat should be good contact with the inner shell and remember to insert the wires back on it.
Gas Water Valve
Unscrew the gas water valve with a wrench and a phillips screwdriver;
Then unscrew the ground wire and disconnect all the terminals between ignition box and other parts. Before putting back the panel, please ensure that all parts are connected, especially the ground wire. For your safety, please use soapy water test on connection between burner and gas water valve, then operate the machine on lowest flame and highest flame. This will help you check the gas leak.
Clean the heating plate on the heat exchanger. When the exchanger is no longer working, it needs replacement. Before you cover the panel, use soapy water test for gas leakage.
Ignition Box
First, pull out the wires of ignition needle and sensor needle. Then unscrew the ground wire and disconnect all the terminals between ignition box and other parts. Last, unscrew the ignition box. After replacement, remember the ground wire must to be connected back.
